
The front/rear derailleur and shifting are the important parts, especially is mountain bikes because the intensity of its usage is frequently. However, if you just got accustomed to bike types having derailleur, you could have confused when it is incorrect. You will feel a little wrong but you do not know the position to adjust. Instead, at bike repair shop, they simply work it. In this article, Asama will instruct how to adjust it basically.
There are many different derailleur types for each bike as well as its different functions. However, the way to installation and adjustment is quite similarity.
The common problem and causes
After using a period of time, derailleur and shifting do not work smoothly, due to following causes:
The cable is stretched on a new bike or changing the new derailleur cable. However, this cause is not considerable.
The cable is dried and rust or cut into small fiber, when you use in a long time without lubrication. If you continue to use, it will be cut at all. It endangers when you are driving. Moreover, it damages group set and will be cut.
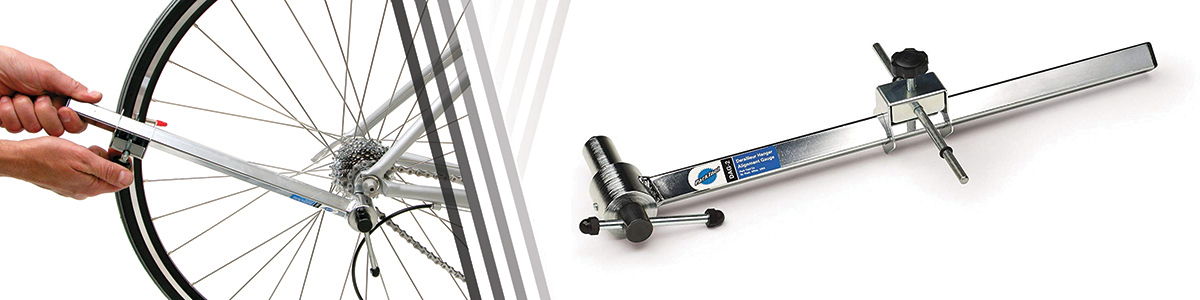
The derailleur hanger is crooked. Since you collide or fall with strong impact on rear derailleur and this makes the derailleur hanger crooked. You hardly see by eyes, just adjust by using the derailleur hanger tool.
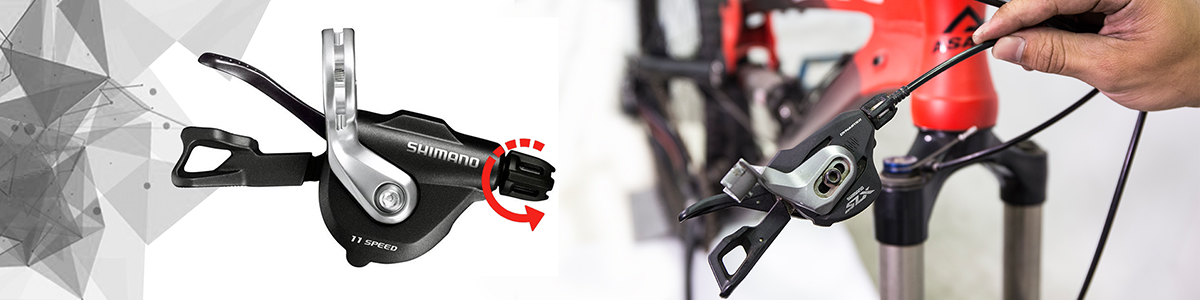
Adjusting the cable on the shifter lever
Left hand: Controls the front gears/front derailleur.
Right hand: Controls the rear gears/rear derailleur.
For a circumstance that the rear gear is stretched:
Firstly, you press down the smallest cog.
Secondly, after the chain is on the smallest cog, you unscrew barrel adjuster on the shifter lever and unscrew it counterclockwise to intensify the cable. Every time you turn the shifter each click and then shift from small cog to large cog. If you still feel the chain not moving smoothly, you can continue to press down the smallest cog and then turn the barrel adjuster. You work it until the chain moves down and on smoothly.
The front gear is stretched:
You shift the smallest cog and work as the rear gear.
For another case, the cable broken or rust:
You should change the new one.
Front derailleur adjustment
On the front derailleur, there are 2 limit screws to keep the chain into chain ring. It is marked “L” and ‘H”:
- The “L” screw: to set the chain at the smallest chain ring.
- The “H” screw: to set the chain at the largest chain ring.
Before working, you need to loosen two screws.
Step 1: The L – screw adjustment
Firstly, you need to press the right shift lever to the largest cog. Next, you press the left shift lever to the smallest chain ring.
Secondly, while you tighten the L – screw, you see front derailleur moving into the chain.
You adjust the L – screw in such a way that the front derailleur surface touches the chain as closely as possible. The gap between the surface and the chain is about 1mm or less.
Step 2: The H- screw adjustment
Firstly, you press the right shift lever to the smallest cog. Next, you press the left shift lever to the largest chain ring.
Secondly, while you tighten the H – screw, you see front derailleur moving into the chain.
You adjust the H - screw in such a way that the front derailleur surface touches the chain as closely as possible. The distance between the surface and the chain is about 1mm or less.
Step 3: Inspecting
Pressing the shift lever up and down to check the chain stuck or dropped out.

Rear derailleur adjustment
The rear derailleur has 3 limit screws:
- 2 limit screws are marked H and L
- 1 limit screw adjusts the intension of the rear derailleur (called B –screw)
Each the rear derailleur has a different position for each screw, but it’s easy to find.
Before adjusting the rear derailleur, you need to loosen L and H screw, yet the B-screw doesn’t.
Step 1: The H – screw adjustment
Shift out of the smallest cog.
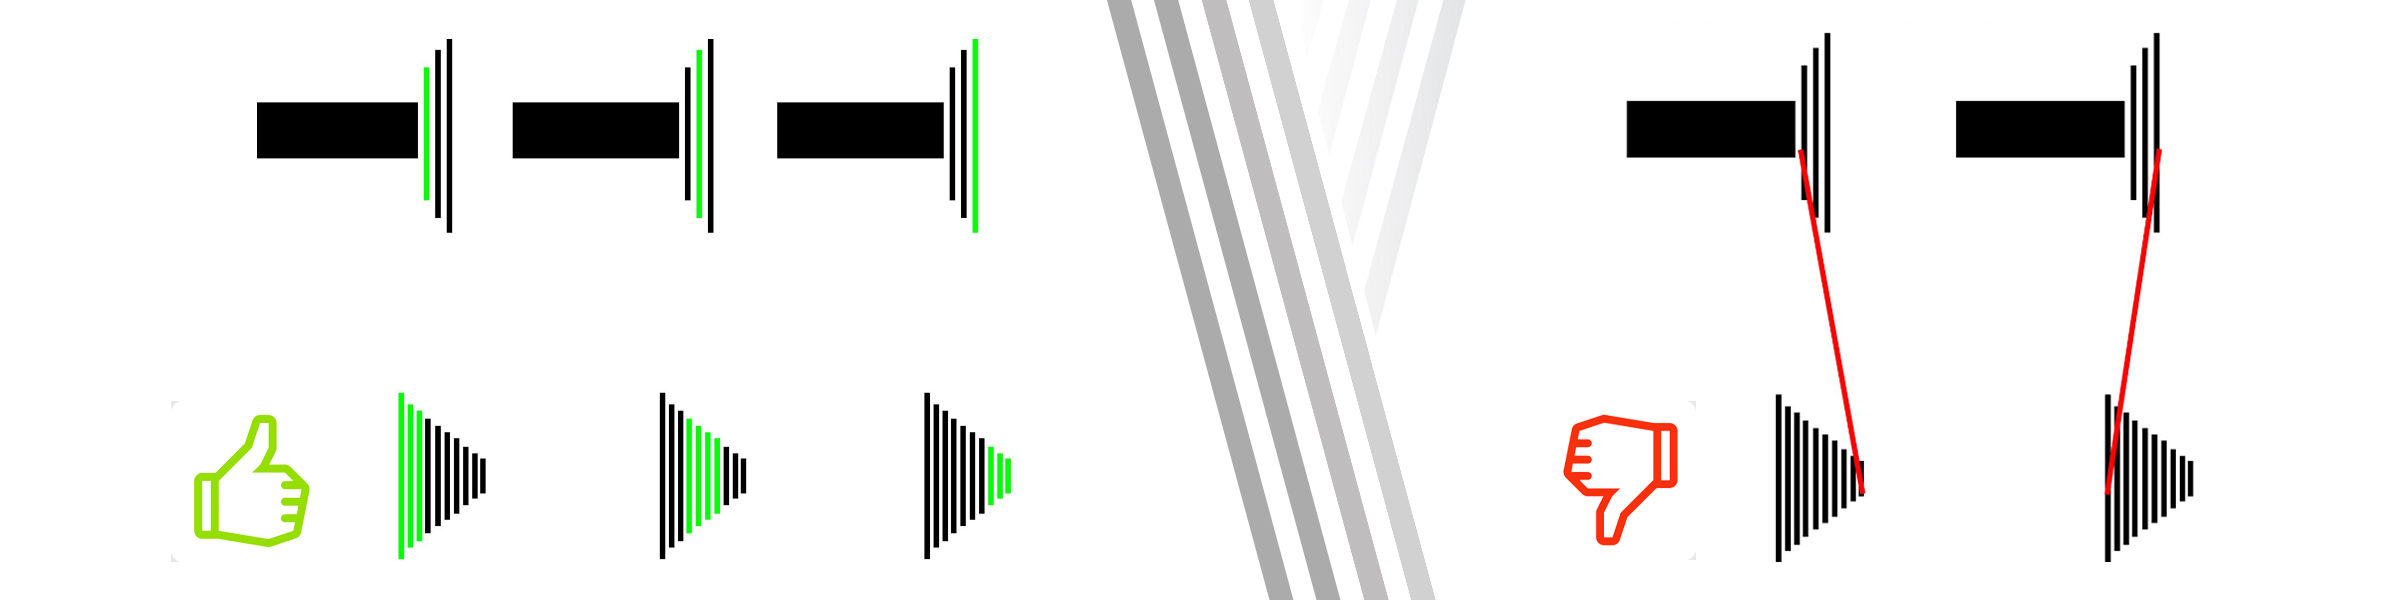
Tighten the H – screw slowly and observe the rear derailleur moving in, tighten it until the jockey wheel aligns with the smallest cog and chain as well and then stop tightening the H – screw.
Step 2: The L – screw adjustment
Shift out of the largest cog.
Tighten the L – screw slowly and also observe the rear derailleur moving out, tighten until the jockey wheel aligns with the largest cog and chain as well and then stop tightening the L – screw.
Step 3: The B – screw adjustment
While you are shifting out of the largest cog, you are looking at the gap between the jockey wheel and the teeth of the cog. The required gap between 2 the teeth is from 5mm - 6mm.
If it is so close, you must loosen the B – screw. But if it is so far, you must tighten it slowly in company with look it.

Bước 4: Inspecting
Shift the shifter out of each cog to check the chain up and down smoothly.
When you do it, notably, neither do the chain lays on the largest chain ring and the largest sprocket nor lays on the smallest chain ring and the smallest sprocket. It causes the cross – chain overly which leads the chain worn out. Moreover, it also affects the chain ring and the sprocket.
The adjusting function of rear derailleur types
The Shimano rear derailleur
The new version of Shimano rear derailleur for terrain bike has a switch lever to lock the rear derailleur.
The function is to make the rear derailleur rigid keeping the chain strong when you are riding on rough road. If you are open the switch lever, the chain will move excessively and can be fell off.
Besides, when you want to put the wheel off, you push the lever to unlock. It will help to pull the rear derailleur easily.
The Sram rear derailleur
The Sram has solid rear derailleurs keeping the chain strong. There is not a switch lever because the Sram has just one mode to hold the rear derailleur solid.
In addition, you wish to put the wheel off, but pulling the rear derailleur so hardly. Therefore, there is a lock button holding the cage plate, which helps to remove the wheel more simply. You just push the cage plate up and press lock button, the rear derailleur will loosen automatically.

Now you can own confidently an ASAMA bike having derailleur. When your bike meets the above problem, you can adjust it easily by yourself. Just work these steps correctly, your bike along with you are ready to conquer roads.